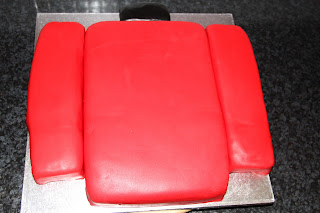
This is my basic step by step guide to how I did it!
STEP ONE
I used a chocolate cake recipe as this is what the client liked best. As the design of the blazer is rectangular I used the most appropriate tins I had. I used 23cm square tins luckily I have more than one tin because I needed three cakes! Decide before hand how big you want your blazer to be and bake in accordance with that.

STEP TWO
Obviously standard rules apply, before I did any cutting I allowed my cakes to cool. Once sufficiently cooled I sliced off the domes and flipped them on their tummies, I cut them to the size of the board. This will differ depending on how big you make your cake just remember to keep an eye out for proportions of the collar and sleeves. My cake was a 16 inch, so I needed allot of cake.

STEP THREE
Once I had all my relevant pieces (sorry arms not pictured) I dirty iced them with vanilla butter cream, again this being the clients preference but you could use anything. I then allowed the cakes to stand set up.

STEP FOUR
Once the butter cream had crusted I smoothed it out using parchment paper and rolled out my fondant (Which took me about an hour to colour as I bought it white) I placed the fondant over the “torso” of the blazer and smoothed it out with my hands getting rid of any air bubbles.

STEP FIVE
I did the same with the arms and the collar, smoothing them all the way around and then attached them to the “torso” using edible glue. Be careful with it, as it takes off some of the colour and once it is stuck you cannot move your pieces without damaging the fondant.

STEP SIX
With all the “body parts” in place I could begin to decorate the blazer, I drew out templates on to bits of parchment paper and used them to cut out the cuffs. I used a small round cutter for the button and used edible spray paint to make them gold. If you are using the spray, let it dry for a while before you stick them on. It would probably be best to do them the day before but not crucial.

STEP SEVEN
I cut out the belt and used round cutters for buckle, and for the line down the front of the jacked I made a rope using the flat edge of a smother, it make the line more accurate and even. I made a few more round buttons and sprayed them gold all the embellishments where stuck on with edible glue.

STEP EIGHT
To finish off, I used silver balls to put his name on as by this stage I couldn’t keep my hand steady enough to get smooth writing lines (all that kneading of colour in to white fondant) but it’s actually trickier than it looked and really way too fiddly for me. I also didn’t like the affect it gave.
